落雨唧?使咩驚,希望在人間丫嘛
Friday, October 2, 2020
Monday, September 28, 2020
Friday, September 25, 2020
Tuesday, September 22, 2020
Sunday, June 21, 2020
Solo Camping: Something you want to know about solo camping but were afraid to ask aka 孤獨露
好鍾意去露營,但一年最多只去到幾次?
好鍾意去露營,但又唔係成日約到腳?
想自己去 solo 但又欠少少動力?有啲怕?有啲唔知點開始?
Solo 係咪好悶架?
Solo 之難難在咩?
Solo 有咩要注意?
大家分享吓...
Tuesday, June 16, 2020
Saturday, June 13, 2020
DIY Carbon fibre secondary poles 自製碳纖天幕副杆
天幕杆我用兩米左右既,平時唔用副杆都幾夠空間,若果有埋副杆當然空間會更好用。
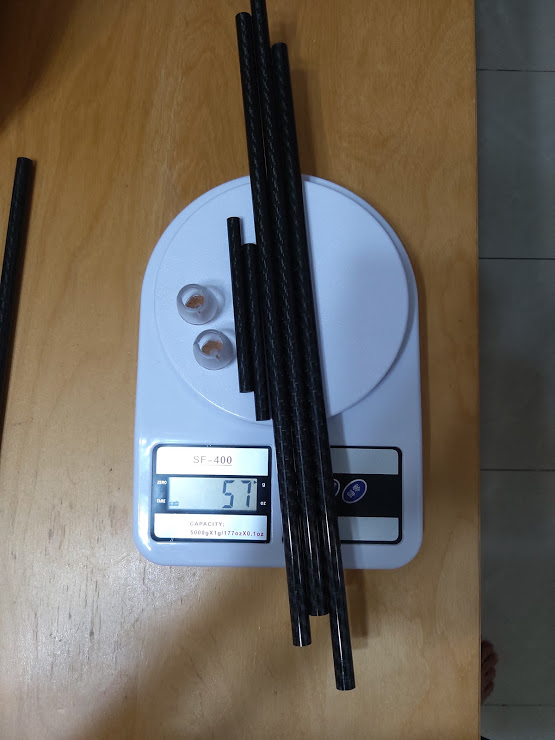
另外,三峰山景前廳如果全開,都要多兩枝杆,而因為山景主杆只係一米鬆啲,另外兩枝當然亦不能太長,所以我又多個原因做多兩枝短少少既碳纖杆。

副杆幼啲無問題,所以索性同山景/藍山 2 一樣粗幼就夠。為咗盡用材料,我造 1.5 米高。
每枝 93g...
山景內帳 530g
銀面天幕做外帳 700g
主 pole 300g 其中一枝係行山杖
副杆 200g
成套頹頹地已經有埋細天幕...
另外,三峰山景前廳如果全開,都要多兩枝杆,而因為山景主杆只係一米鬆啲,另外兩枝當然亦不能太長,所以我又多個原因做多兩枝短少少既碳纖杆。

副杆幼啲無問題,所以索性同山景/藍山 2 一樣粗幼就夠。為咗盡用材料,我造 1.5 米高。
每枝 93g...
山景內帳 530g
銀面天幕做外帳 700g
主 pole 300g 其中一枝係行山杖
副杆 200g
成套頹頹地已經有埋細天幕...
Sunday, May 17, 2020
露營充電風扇
我怕熱,但又鍾意露營,所以特別留意風扇。
如果咩因素都唔考慮,最理想既露營風扇係最平嗰種吊扇。但若考慮方便、重量、帳幕等因素,答案就會有啲唔同。今次唔講最平那種吊扇,反而講兩隻貴少少既。
以下呢兩款最大唔同係有內置充電池,用起嚟方便好多。
第一款係無罩既,風力比平價吊扇為強,但風量卻就比唔上。個人覺得風量係重要啲既!佢重量好老實,標幾多就真係幾多。電量方面,我無再測試過,但佢標 8000mAh 而實測確係夠用兩日一夜唔停開。


呢把野有遙控器,其實相當實用,因為半夜涼咗,亦唔使坐起身就可以調較,如果怕比扇葉把到呢,更加可以瞓低咗先開,閂咗先起身,安全度提升。
無罩既缺點係有機會被扇葉打到,但我自己從來都無試過。但無罩確實有機會打到內帳,尤其實較窄身既金仔營,若果係用金仔呢,我建議都係要搵個有罩既扇。
呢把野最大缺點係略為難收落背包,因為怕會壓爛,但其實扇葉都可以拆出嚟,而呢個應該唔係廠方既設計,而係要少少暴力,我相信拆得多無益:


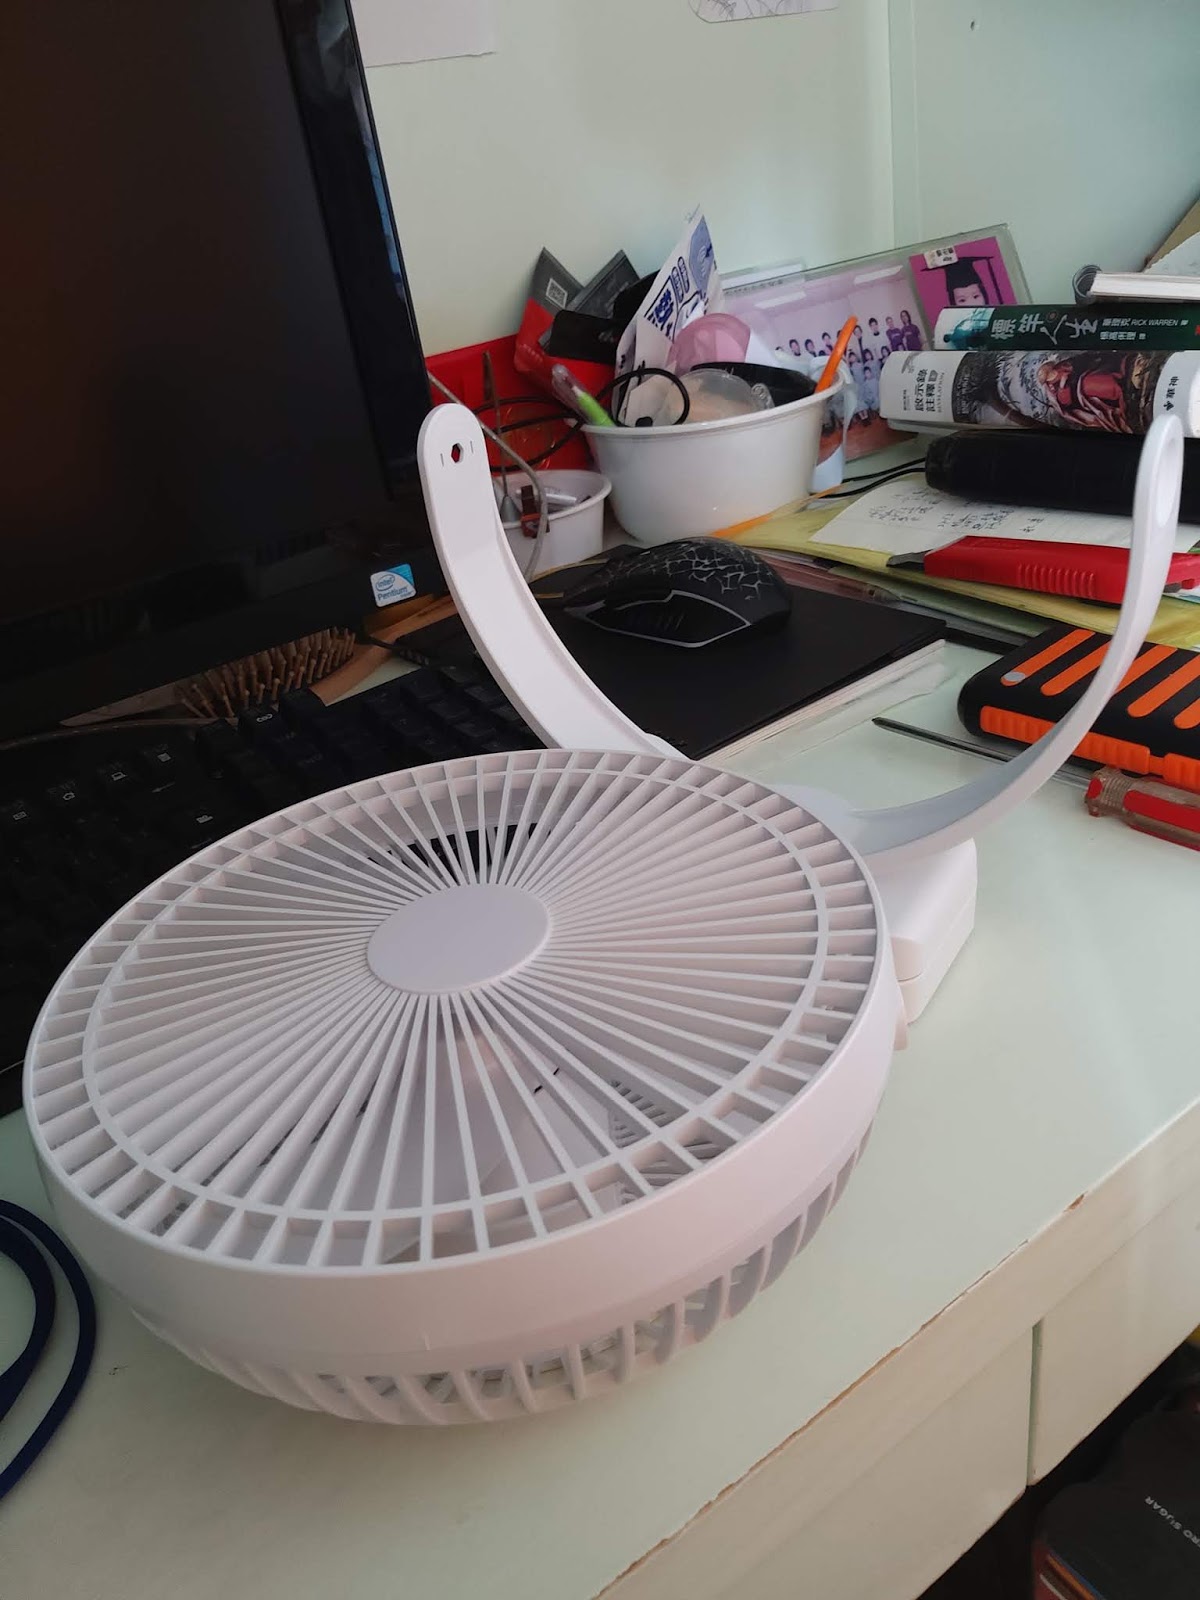
呢把大咗,又重咗唔少喎,但有罩!呢把貴啲而且無遙控,但因為有罩遙控器又變成無咁大需要。佢有個 fork mount 同加個夾,可以坐枱,又可以掛起。電量方面更有 10000mAh,風力同上面差唔多,扇葉呎吋其實亦差不多。前罩可以拆開清潔,甚至唔帶出去再輕啲!
Fork mount 旁邊接口位可以打開,拆咗螺絲就可以獨立吊起用:


De-fork 之後,只適合吊起用,重量如下:

前罩重 84g,即係得返 350g... 事實上,若用在金仔,有後罩已經唔會打到內帳!所以呢把野確實係有佢既價值!而因為有罩保護,帶出帶入亦無咁怕壓爛。
我以前用金仔係要靠大芭蕉,有咗呢把就多個選擇。
關於大芭蕉同平價吊扇,可看回舊文:
http://osioworld.blogspot.com/2018/10/blog-post.html
如果咩因素都唔考慮,最理想既露營風扇係最平嗰種吊扇。但若考慮方便、重量、帳幕等因素,答案就會有啲唔同。今次唔講最平那種吊扇,反而講兩隻貴少少既。
以下呢兩款最大唔同係有內置充電池,用起嚟方便好多。
第一款係無罩既,風力比平價吊扇為強,但風量卻就比唔上。個人覺得風量係重要啲既!佢重量好老實,標幾多就真係幾多。電量方面,我無再測試過,但佢標 8000mAh 而實測確係夠用兩日一夜唔停開。


呢把野有遙控器,其實相當實用,因為半夜涼咗,亦唔使坐起身就可以調較,如果怕比扇葉把到呢,更加可以瞓低咗先開,閂咗先起身,安全度提升。
無罩既缺點係有機會被扇葉打到,但我自己從來都無試過。但無罩確實有機會打到內帳,尤其實較窄身既金仔營,若果係用金仔呢,我建議都係要搵個有罩既扇。
呢把野最大缺點係略為難收落背包,因為怕會壓爛,但其實扇葉都可以拆出嚟,而呢個應該唔係廠方既設計,而係要少少暴力,我相信拆得多無益:


拆開機芯有機油,灰色直頭就係磁石嚟!有機會整爛!但拆開啲確易帶出街好多!
好,既然無罩係呢把野最大既缺點,所以我又入咗另一件貨:

Fork mount 旁邊接口位可以打開,拆咗螺絲就可以獨立吊起用:

De-fork 之後,只適合吊起用,重量如下:

前罩重 84g,即係得返 350g... 事實上,若用在金仔,有後罩已經唔會打到內帳!所以呢把野確實係有佢既價值!而因為有罩保護,帶出帶入亦無咁怕壓爛。
我以前用金仔係要靠大芭蕉,有咗呢把就多個選擇。
關於大芭蕉同平價吊扇,可看回舊文:
http://osioworld.blogspot.com/2018/10/blog-post.html
後尾拍咗條片:
Sunday, May 3, 2020
陳百強的「等」和何韻詩的「明目張膽」
兩個年代的兩種態度。

若說王菲「約定」的續集是「郵差」,那麼這「明目張膽」更是明目張膽的去接續「等」。
Intro 已經「明目張膽」地讓人想起「等」。
八十年代簡單,千禧後的率直。
若說等,苦是因為你在選擇人,別人亦能選擇你。
若說真的等,那就不應明目張膽了。
既然你可選擇人,你也可以選擇企後幾寸去幻想,但千萬別要摸。
與其糊塗地換來他朝無窮的後悔,倒不如清醒地縮到最小,甚至彷彿不存在。
關鍵就是有權愛,其實也有權不必被愛,當然也有權選擇怎樣愛。
感覺又是「約定」和「郵差」背後的現實主義。
八十年代愛說:「做了後悔,總比不做後悔好」
千禧後世界並沒有變好,所以不做可以讓後悔更少。
最後選一些回應「等」的那種自憐宿命論:
Bridge:
暗裏進行更自在 不相戀 誰會受害 但願盡情地種 誰說花 需要開
Ending:
如若你發覺有我在 就結束暗戀的時代 無謂去博你憐愛
明白叫你太煩的 不是愛
如若我也有權愛 同樣我也有權揀 怎樣愛
Friday, May 1, 2020
夏天露營經驗分享
上集:
天幕真係極重要,其實就算冬天都係,只要太陽一出,你用咩營都會曬醒,甚至熱醒!
所以啲咩前廳、外掛既前廳,又或者咩廳都好、大金字塔、雙 A 又好,你當儲物還可,但只要太陽一出,全部都要收檔!
補充多少少關於收營:夏天只要太陽曬住 (其實冬天都係),營內溫度便會急升,所以最好醒咗就收睡袋、地蓆跟手晨埋,免得食完早餐要走返入去個焗爐去收拾細軟。
下集:
Tuesday, April 28, 2020
Streaming to YouTube and Facebook at the same time by using OBS Studio
This has been asked and there are than one (paid) solutions to this problem.
In this article, I'm going to introduce a totally free method.
I ain't going to go into the steps but if you know how to do streaming to YouTube/FB, you will be able to understand this method easily. If you don't know how to do streaming to a single platform, you won't probably ask this question, right?
To make everything simple, the whole concept is to do streaming on a stream. I guess some people might already know how it goes, if you still don't get it, please read on.
First of all, you will use OBS to stream to either YouTube or Facebook as usual, let say you will use OBS to stream to YouTube first.
Now, you've a YouTube stream and now you will on to have it on Facebook live as well. To do that, you use a separate computer to play that YouTube stream. And then on this computer, start another OBS, capture that YouTube stream with OBS and then stream it to Facebook, QED.
That's what I meant by streaming a stream.
Friday, April 17, 2020
為你鍾情 Ukulele tab
Probably the most requested tab, so here we go:

A cheap demo quite a long time ago:
Thursday, February 27, 2020
DIY Carbon Pole for 3F Lanshan 2 Tent
I made one myself, the weight of the major raw materials:

Finished product, first generation:

It was first tested in 長咀 and the wind was exceptionally strong! So, it's well tested in the first time!

After initial testing, I further enhance it later like this with scratch parts at home:

It should be better for fixing on the land, and better protecting the tent on top.
New camping headlamp and fixing the old one (Nitecore)
My trusty headlamp has its mounting damaged during the last camping trip, I packed my stuff too tight.
Anyway, I tried to fix it and here's the process.
This is how it breaks, I tried to glue the broken part back, but it does not work well.

So, I took the plunge to remove it altogether, and then flatten the surface:

And then I will need to find replacement part and the plastic mounting seems to work?

So, I remove one of the mounting holes to be attached on my headlamp back plate:

Given two flattened surface, glue worked far better.
I tried to put the headlamp in different angles and the adjustment mechanism work just fine, and it stayed in place in all the click stop positions.


Of course, it's not original and it's going to fail again without warning. So I decided to use it only for camping or stargazing, and when I won't need to depend on it for safety.
--
Since reliability is important during night camping, especially sometimes I will go after sunset, so the light has to be trusty during night hiking and camp setup.
So here's my new headlamp, also from Nitecore:

This one is lighter, but the battery life is very similar. Far more than enough for night camping or overnight hiking trip.
It has no red light mode, and it only got a single button. The mounting plastic has a lot of holes to reduce the weight, so it's absolutely a light weight headlamp.

When fully retracted in the home position, there's a small cover to protect the button from being accidentally pressed. Really nice!
The headlamp strap is improved as well.

Note their difference in weight:


16g reduction is significant given their base weight.
Wednesday, January 22, 2020
DIY Camping Lamp from useless stuff
I've found two pieces of lithium battery from old mobile phone.
A charging circuit board from a dead battery pack.

And a LED panel from a dead desktop light.

By adding a simple switch, a new camping light were born:

I made a paper box to cover the battery.
With this battery pack charging circuit, the charging speed is now faster.

I used a mobile phone mounting to fix it on a small tripod, and then to use it in actual scenario.
It has been over 8 hours and it's still up and kicking.

More than enough for overnight camping.
Weight reduction, some DIY work
Drilled some holes around the handle of my pan, forget to record the weight before.


I believe around 2-3g and maybe 5g maximum? Anyway, it's easy and no harm to the functionality.
I am not those kind of ultra-light person, I just want more weight reduction for easier hiking, and maybe even bring more stuff or food.
--
I checked the original weight from the manufacturer, and they said 40g. So the weight reduction is 5g which means 12.5%.
Subscribe to:
Posts (Atom)

